Overview
This exercise consists of three main parts that will take you from basic networking concepts to building a complete web server application with drag-and-drop functionality on the ESP8266 D1 Mini platform.
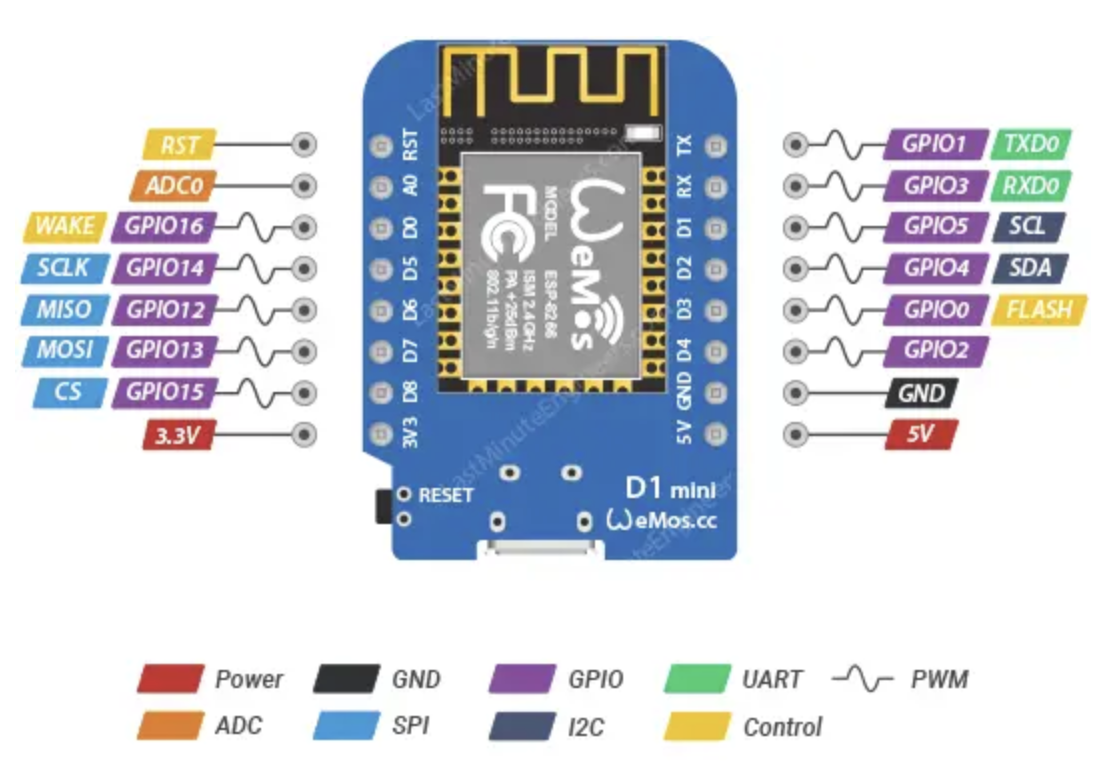
Once the Wi-Fi connection is established, the ESP8266 can: Respond to HTTP requests (GET/POST), Return HTML pages, Receive form data or AJAX calls, and Control I/O pins through the browser.
Arduino IDE Setup for ESP8266 D1 Mini
Add ESP8266 Board Manager URL
- Open: File → Preferences
- Add to "Additional Boards Manager URLs":
http://arduino.esp8266.com/stable/package_esp8266com_index.json- Select Board Manager ESP8266
Part 1: Fundamentals - Networking & Communication
CSV (Comma Separated Values)
CSV is a simple file format where values are separated by commas. Example:
23,0.6,hello
Each value separated by a comma. First value: 23, second: 0.6, third: "hello"
JSON (JavaScript Object Notation)
JSON is a structured file format where data is represented as key-value pairs. Example:
{
  "temperature": 23,
  "humidity": 0.6,
  "message": "hello"
}
JSON uses curly braces {} for objects and square brackets [] for arrays.
🎥 Video Tutorial
Watch the tutorial video (Duration: ~15-20 minutes):
▶ Watch on YouTube (starts at 4:43)📚 Useful Links and Resources
- ESP8266 Web Server Tutorial - Access Point mode guide
- ESP8266 HTTP GET and POST - Good place to practice HTTP requests
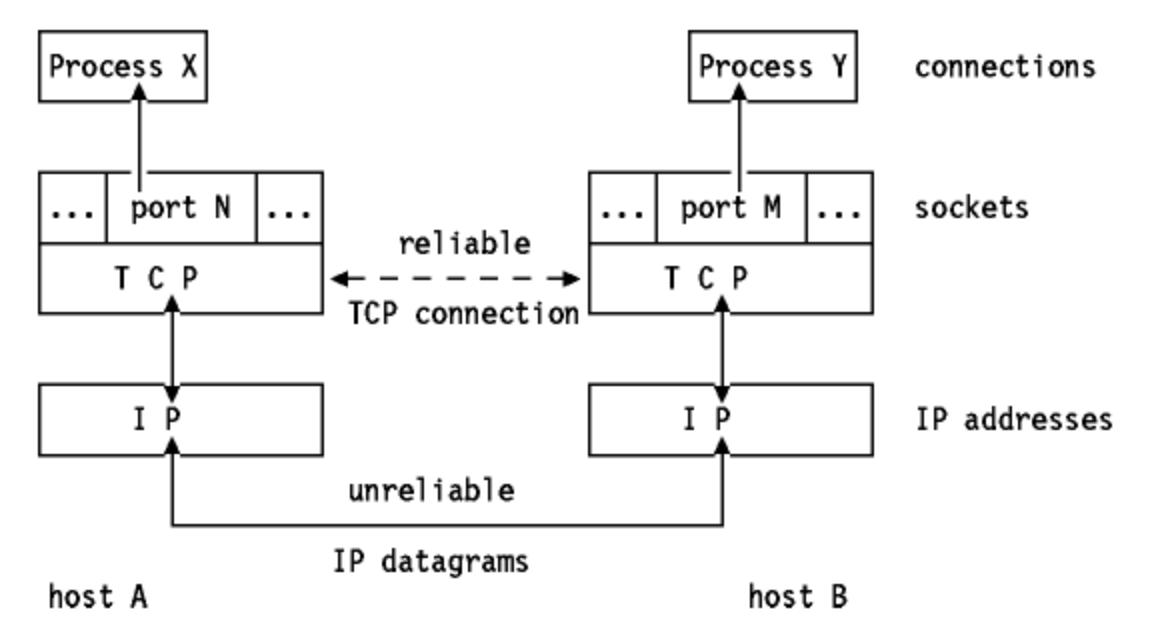
TCP/IP Protocol
TCP/IP is the fundamental protocol that enables network communication. ESP8266 uses TCP/IP through Wi-Fi connection.
Part 2: Web Development Basics
- Server Creation (AP/Station Mode)
- HTML Basics → W3Schools Tutorial
- JavaScript Fundamentals → W3Schools Tutorial
- CSS Styling → W3Schools Tutorial
Part 3: Advanced Drag-and-Drop UI
Drag & Drop Keywords - Step-by-Step AI Guide
Step-by-step guide: What to ask AI when creating drag and drop functionality from scratch:
UI Elements & Controls
Additional elements for user interaction:
Radio Buttons = Only ONE can be selected (same name attribute)